Αναζήτηση

Εμφάνιση αναρτήσεων με ετικέτα crafts. Εμφάνιση όλων των αναρτήσεων

Κυριακή 5 Απριλίου 2020

Lesson_Plan: Numbers_Revision

Our plan for today!

Subject: Numbers 1-10


Key terms: number,one ,two, three, four, five, six, seven, eight, nine, ten

Learning objectives: Revise counting one to ten, start identifying the numbers.

Materials and preparation: computer/tablet, printer (optional), tray/plate, salt/flour, lego bricks, white papers, markers, scissors, glue, bucket, newspaper/junk papers, brush, materials for collage[check below on the arts & crafts part]


➤Sensory activities
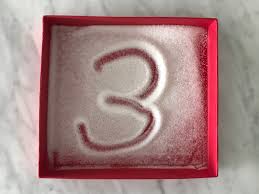
Time to get messy!💕 We have two activities using these materials: some flour/salt, a tray/plate - any color except white -, markers, an A4 page, a small brush and the numbers’ flashcards.

👉The first one is a pre-writing activity where you need the flashcards for the kids to see and copy the numbers and the tray to write the numbers on with their finger. One card at the time please. About the tray/plate, must not be white because the flour and the salt is also white and they will not be able to see what they write.


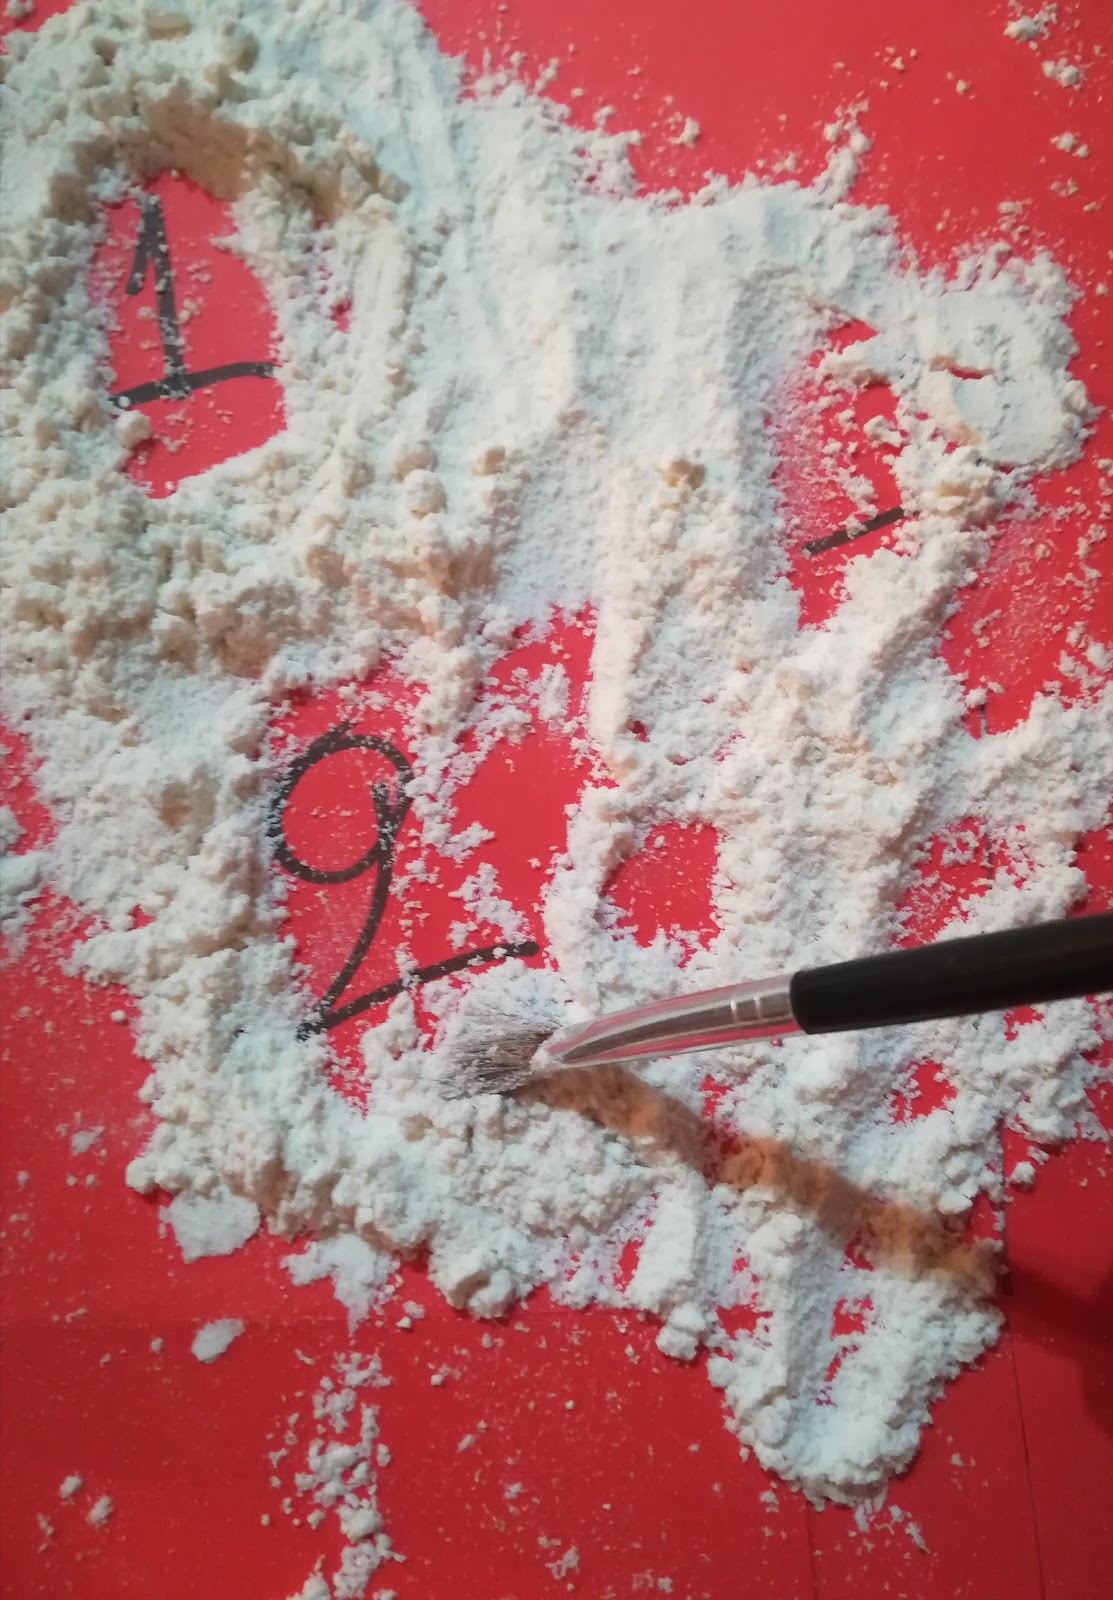
👉The second activity is about seeking and matching the numbers. Write, all across an A4 page, all the numbers from 0 to 10 with different color marker. Write down in line the numbers on a second paper also. After, cover the numbers and the page with a layer of flour/salt and give the child a small brush to start brushing the flour/salt up and revealing the numbers. Everytime the child finds a number, has to name it and delete it from the list. Good luck with the excavation!


➤Lego constructions
Get ready to build some towers! Firstly, lay all the flashcards on the floor in order, from 1 to 10, you can ask some help from your child. It’s not an easy task, so do not worry if they can not find the right following number every time. Once the cards are ready, take the lego bucket, start from the beginning, identify the number and put the right amount of bricks to build the tower for each number, like the example. Count every time the bricks to be sure.


 1   2   3  4  5   6   7  8  9  10
💚💛💙💜💛💙💜💚💚💙
      💛💙💜💛💙💜💚💚💙
           💙💜💛💙💜💚💚💙
                 💜💛💙💜💚💚💙
                       💛💙💜💚💚💙
                             💙💜💚💚💙
                                  💜💚💚💙
                                        💚💚💙
                                              💚💙
                                                    💙 

➤ Action game
For this game you will need some old newspapers/magazines, supermarket brochures or any paper you don’t need. Screw the papers into balls with your children and make plenty of them. Find a bucket and place it in a small distance from you. Write down your names and throw by turns equal number of balls in the bucket. Count how many you put in and see who is the winner! 😁

➤ Arts & crafts
✂This is a big project craft about the numbers that is going to keep your children busy all week long. You have to gather eleven different materials to fill in the big numbers. Print big numbers or sketch your own on papers, one for each number. Provide your children with a glue and let them stick the materials you have given between the lines of the number. One different material for each number. Some materials you can use are (*don’t forget to keep an eye on the children and ensure they are safe*): lentil, rice, couscous, salt, cereals, different colored papers, feathers, pom poms, crepe/tissue paper balls, ribbons, buttons, pencils’ shavings  or anything you can think and find in the house that can be glued. In this way you will create different texture card numbers to feel and you can also hang them in the kids’ rooms to practise every day.

➤ Educational online games
💻The following game is about the order of the numbers and the kids have to click on the one missing. It is challenging so you should give it a try!
Note: If you like, you can have the flashcards in order next to you so the kids can see the numbers.

💻This game is also enjoyable offering multiple choices on the tasks. You have to put on the ladybug’s dots by counting, matching or ordering. Easy peasy!


''That was it! I hope it was a useful project and you had fun. See you soon!''
SM

Σάββατο 28 Μαρτίου 2020

Lesson_Plan: Colors_2


Our plan for today!

Subject: RAINBOW COLORS


Key terms: rainbow, red, orange, yellow, green, blue, purple, pink

Materials and preparation: computer or tablet, scissors, glue, colored paper (blue, red,
yellow, orange, green, purple, pink, white), markers, fingerpaints
You might need (look below): flour, water, salt, food color, paper plates.

Learning objectives:
Learn the rainbow colors, identify and distinguish orange, purple, pink and green.

➤ Introduction
In order to test the knowledge and memory of your children, show some flashcards with
the colors and ask if they know each of them. Use any color flashcards you can find online. You
can also draw your color splash and ask from your child to paint it for each color.


➤ SongIn the link below you can find the rainbow song where colors are introduced in order one
by one. Help the children to sing and repeat the colors. It is necessary to watch the video so
the children can match the name of the color with the picture of it. If you don’t have access to a screen, you can sing the song and show each time the right flashcard with the called color.
https://www.youtube.com/watch?v=tRNy2i75tCc
RED
ORANGE
YELLOW
GREEN
BLUE
PURPLE
PINK

➤E-book
This online book with no description pictures is very interesting and small. It is about color
orange and how it is made. The challenge is your children to see the pictures and try to
describe what is happening in the story using their imagination. Support their thoughts
and encourage their attempt to develop their speech.
https://freekidsbooks.org/bow-meow-wow-wordless-picture-book/


➤Arts & Crafts
1. All of us are so happy when we see a rainbow! What about creating one? The materials you
need are scissors, glue, a white A4 or paper plate cutted in half, markers and colored papers
(red, orange, yellow, green, blue, purple and pink - if you want) or tissue paper can work as well.
You and your children can practise cutting the papers with scissors or you can tear them apart in small pieces. Do not forget to draw curved lines with colored markers to make a rainbow so as
the kids can see and follow where they have to place the right color and stick the paper.

2. Another idea is to create colored water using your recycled bottles. Fill them till the middle and
throw some pieces of crepe paper in and wait a few mintutes for it. Shake bottles and ready to play.
You can also try to mix some colors.


3. Another way, more sensory, to create a rainbow is to paint it with the hands! Activities like this
is children’s most favorite! All you need is a white piece of paper and finger paints. Again you can
help by drawing the colored lines in order for the kids to use them as a driver to paint with finger
dots. Moreover, if you have a very large paper you can even use handprints and make a family craft all together! Get ready for the mess, it’s ok!😃😅

Alternative
In case you don’t have finger paint, there is a solution. Make your own!
↪INGREDIENTS:
-½ cup of flour
-½ cup of water
-¼ cup of salt
-food coloring
👉Mix the flour with the salt and the color with the water separately.
Add the liquids in the solids and stir very well. Ready!


➤Educational online games
It is time for your children to experience the numerous potentials there are on the Internet using
a computer or tablet. Here are two options of an educational software I can suggest, very easy
to use with your help of course.

http://www.sheppardsoftware.com/preschool/colors/colorgame.htm
In this game you have 5 colored frames and many pictures on top classified by color, which you have to drag and drop in the right frame. Be a model for your child and show how to do it. You can ask to name the color of the item that is dragged everytime.


http://www.sheppardsoftware.com/preschool/ngames/colors.htm
This game is about sorting items by color blue, red, yellow, orange, purple and green. You
are helping a colored monster to tidy up so it’s going to be funny for the children.

➤Action game
You can play a simple and energetic game using the flashcards that you have already.What you have to do is to spread around the house the colored flash cards.After that explain to your children that they have to go and find the color you call and do an action you prospose.You can use a little song to make it funnier like: “Where is red? Where is red?Go to the red, go to the red”. Like this they can match what they hear with what thesee working on the visual and hearing perception. Every time they find a colored card, suggesta different movement for the color. For example 'Jump on the red, clap on thegreen, sit on the pink, tap your knees on the blue, hop on the orange, spin on the purple'

Παρασκευή 27 Μαρτίου 2020

Lesson_Plan: Colors_1

Our plan for today! 

👉All our occupation plans include crafts and activities for which you are going to use simple materials that you already have in the house. Sometimes you might have to print or you can create what you need on your own. Feel free to use an alternative way and adjust the activity to your preference and availability. After all, it's only about fun!😀


Materials and preparation: Toys, computer or projector to play songs and videos, crayons or markers, art paper(red, blue, yellow, white), printer, scissors, glue, flour, water, food color, cream of tartar (optional) 


Key terms:  red   yellow  blue

Learning objectives: Revising the primary colors so the children will be able to name, identify and separate the three basic colors - red, blue and yellow.

 ➤ Introduction
Select  any three toys from the kids’ room - one red, one blue, one yellow. Cut 3 circles of red, blue and yellow paper and place them on the floor. In case you don’t have colored paper, you can draw 3 circles on white paper and color it with your children. Then ask ‘What color is the toy?’. They might answer correct, if not it’s ok. Repeat the question for each of the toys and name the colors. Ask them to put the toy on the right circle according to the color. 

 ➤Song
The next step is to click on the following link where you are going to watch a small video  with the three colors being introduced. You can repeat also the colors and motivate your child to name loud and clear the colors. ➢https://www.youtube.com/watch?v=Iev1wgRVdwo  
*If you don’t / can’t watch it, you can only listen to it and raise up each time the right color circle. After this, the three colors will be more clear in the child’s mind. 

Independent  practice
It’s time to play and and have fun! Count till 20 and ask the kids to go and find one red toy, one blue and one yellow and place them again on the right circle. If they need more time, you can count again. Alternatively, you can count till 10 for each color - toy separately. Repeat the game till you run out of toys!

Something that children adore to do is using the play dough, especially when they make it! With your help we are going to make easy homemade play dough that you can preserve in the fridge for a week at least in a plastic bag! The best part is that we are going to color it with food colors and make it even funnier. The ingredients are simple, you have them in your kitchen more or less, and the procedure very easy, so please follow up.

Ingredients
*1 cup of plain flour
*½  cup of salt
*1 tablespoon of cream tartar (optional)
*½  cup of water
*1 tablespoon vegetable oil
*4 drops of food color {If you don’t have food color you can use liquid paint like tempera}

Instructions
*Mix together the flour, salt and cream of tartar. 
*Mix together ½ cup of water with a few drops of food coloring and the oil with a spoon. 
*Slowly pour the water into the flour mixture, stirring as you pour. Stir until combined, then knead with your hands until the flour is completely absorbed. If the dough is too sticky, add more flour until it doesn’t stick at all.
 *Repeat process for other colors you want to make. 
* Notes *Mixing the food coloring with the water before combining with the dry ingredients allows you to blend them by stirring, without staining your hands.
➽ You have so many ways to play with the dough. You can make shapes, sculptures and freestyle creations, you can use your cookie cutters, you can provide your children with materials like buttons, straws, etc. by color and dip them in the right dough or let them play on their own free way as long as they want. I’m sure it will take long! BE SURE TO ALWAYS KEEP AN EYE ON YOUR CHILDREN AND CHECK THEY PLAY SAFELY.

E-book
Here is a free online illustrated book based on the colors we are working on today. 
This story is about a little furry yellow monster that lives inside a sock and all the fun he has with his friends. It discusses a nice message about friendship.

Arts & Crafts
All you need for this activity is to find some pictures of items that naturally have the colors red, blur, yellow and print them. However, if you don’t possess a printer, you can sketch them handmade on a A4 white paper. Give to your children red, yellow and blue craft paper and ask to tear them apart in small pieces. Give them some glue to use and stick the right color pieces inside the lines. Your collage is ready.
(*RED APPLE *YELLOW SUN *BLUE DOLPHIN)

‘Hope you liked it. Stay tuned for the next lesson plans about colors!’
SM

Lesson plan: Sea life